Details of Final Design
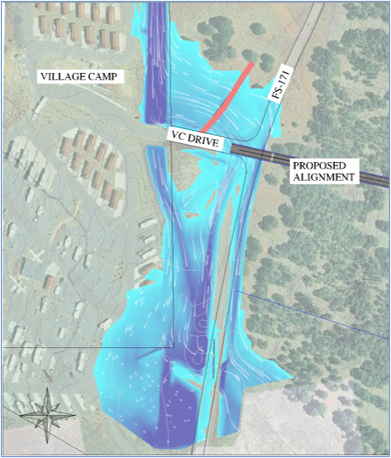
The image below shows the details of the flow split provided by Ardurra for the purpose of modeling the off-site FEMA flows through Culvert 1.
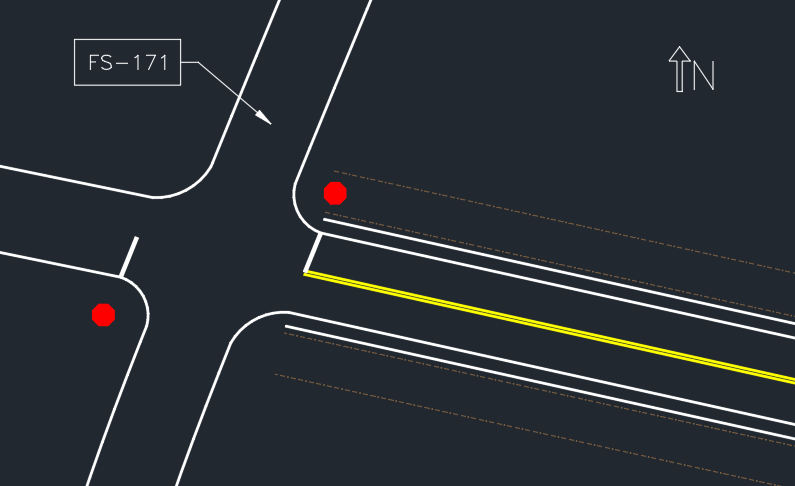
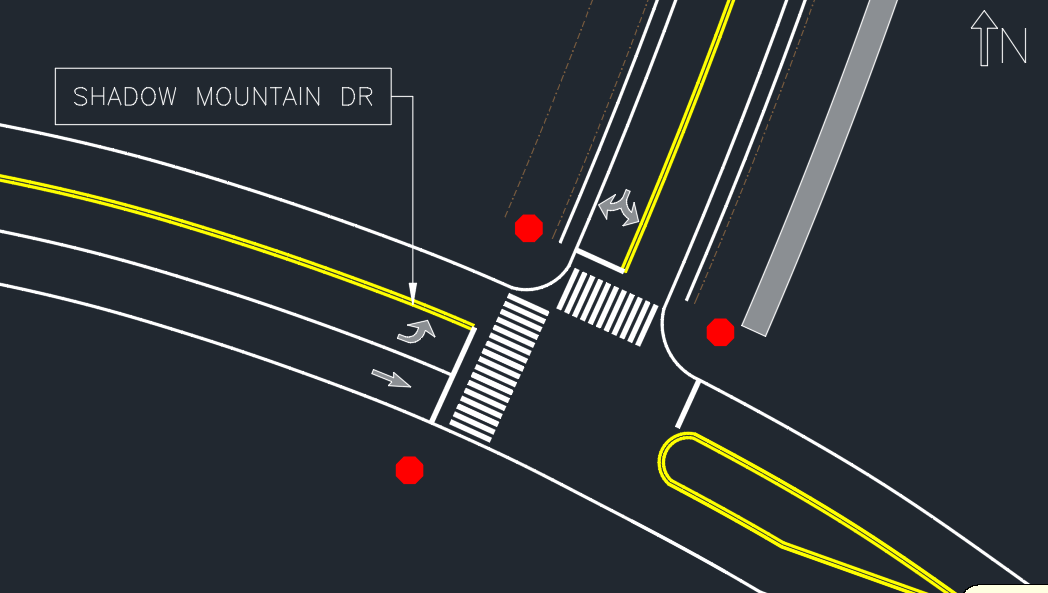
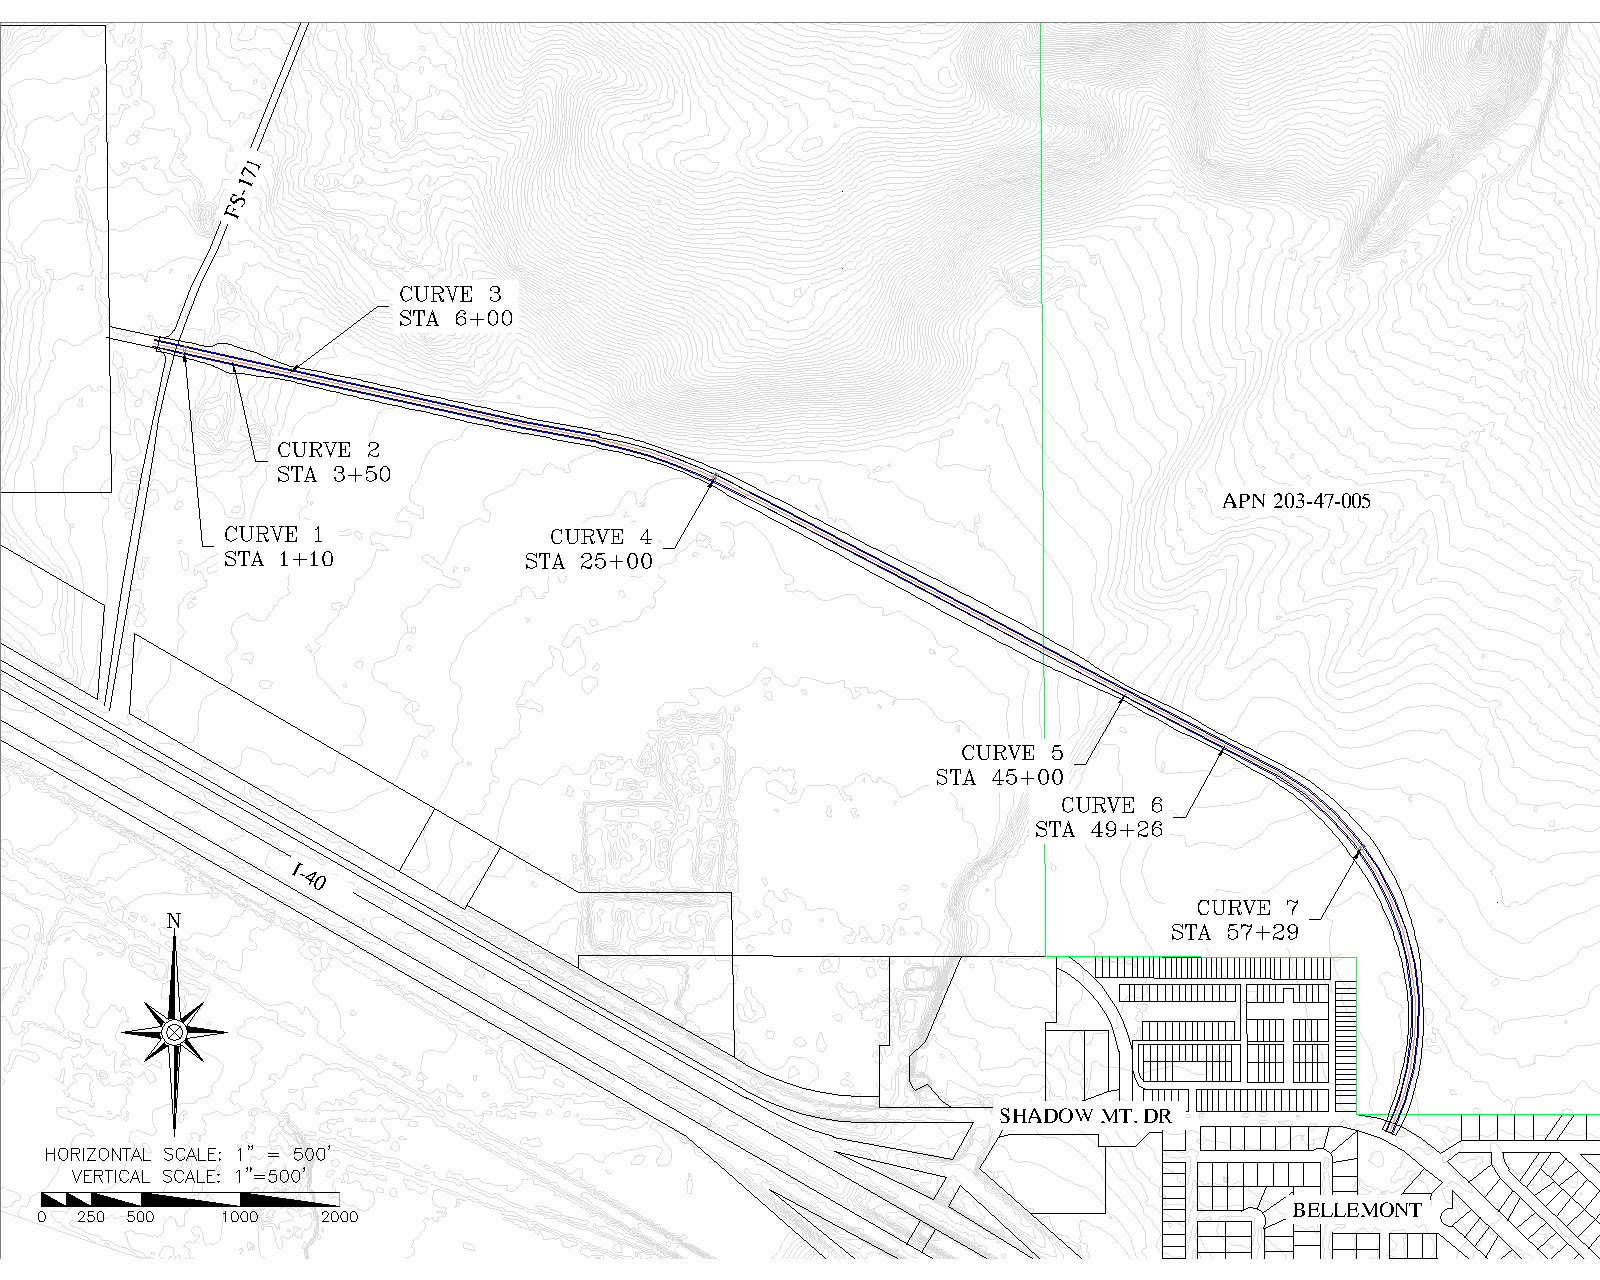
The images below shows the details of the possible intersection design and layout for both the FS 171 and Shadow Mountain Dr connection to the proposed roadway. These images are for demonstration purposes only, as full intersection design is out of the scope of this project.
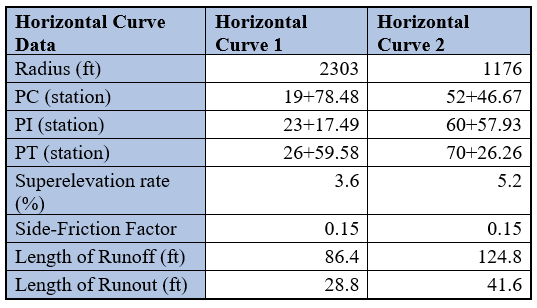
The table below shows the details of the horizontal curves for the proposed roadway.
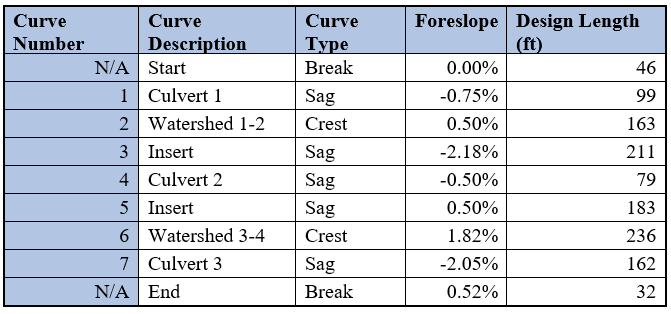
The table below shows the details of the vertical curves for the proposed roadway.
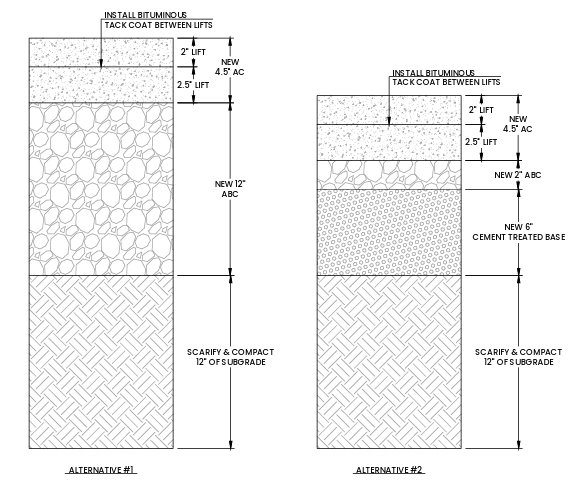
The image below shows the details of each proposed structural section alternative.
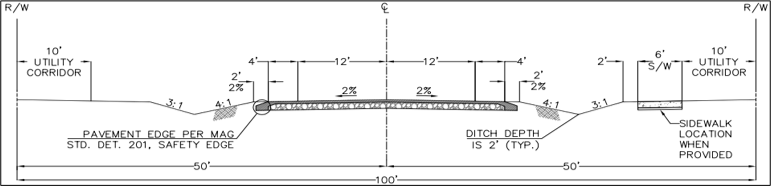
The image below shows the details of the proposed roadway cross-section.
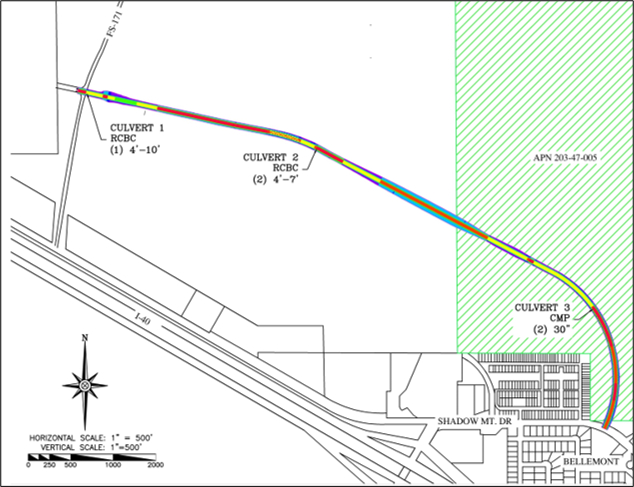
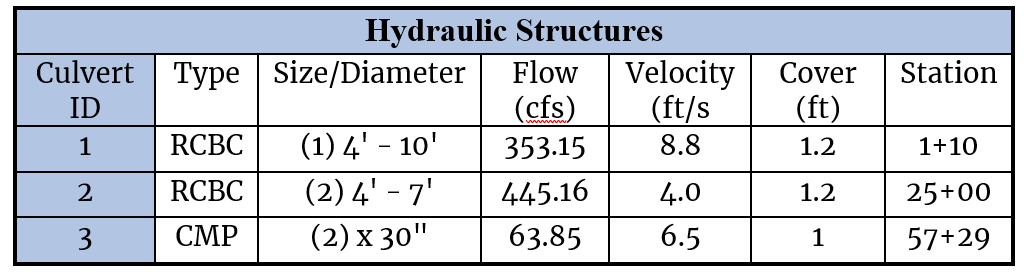
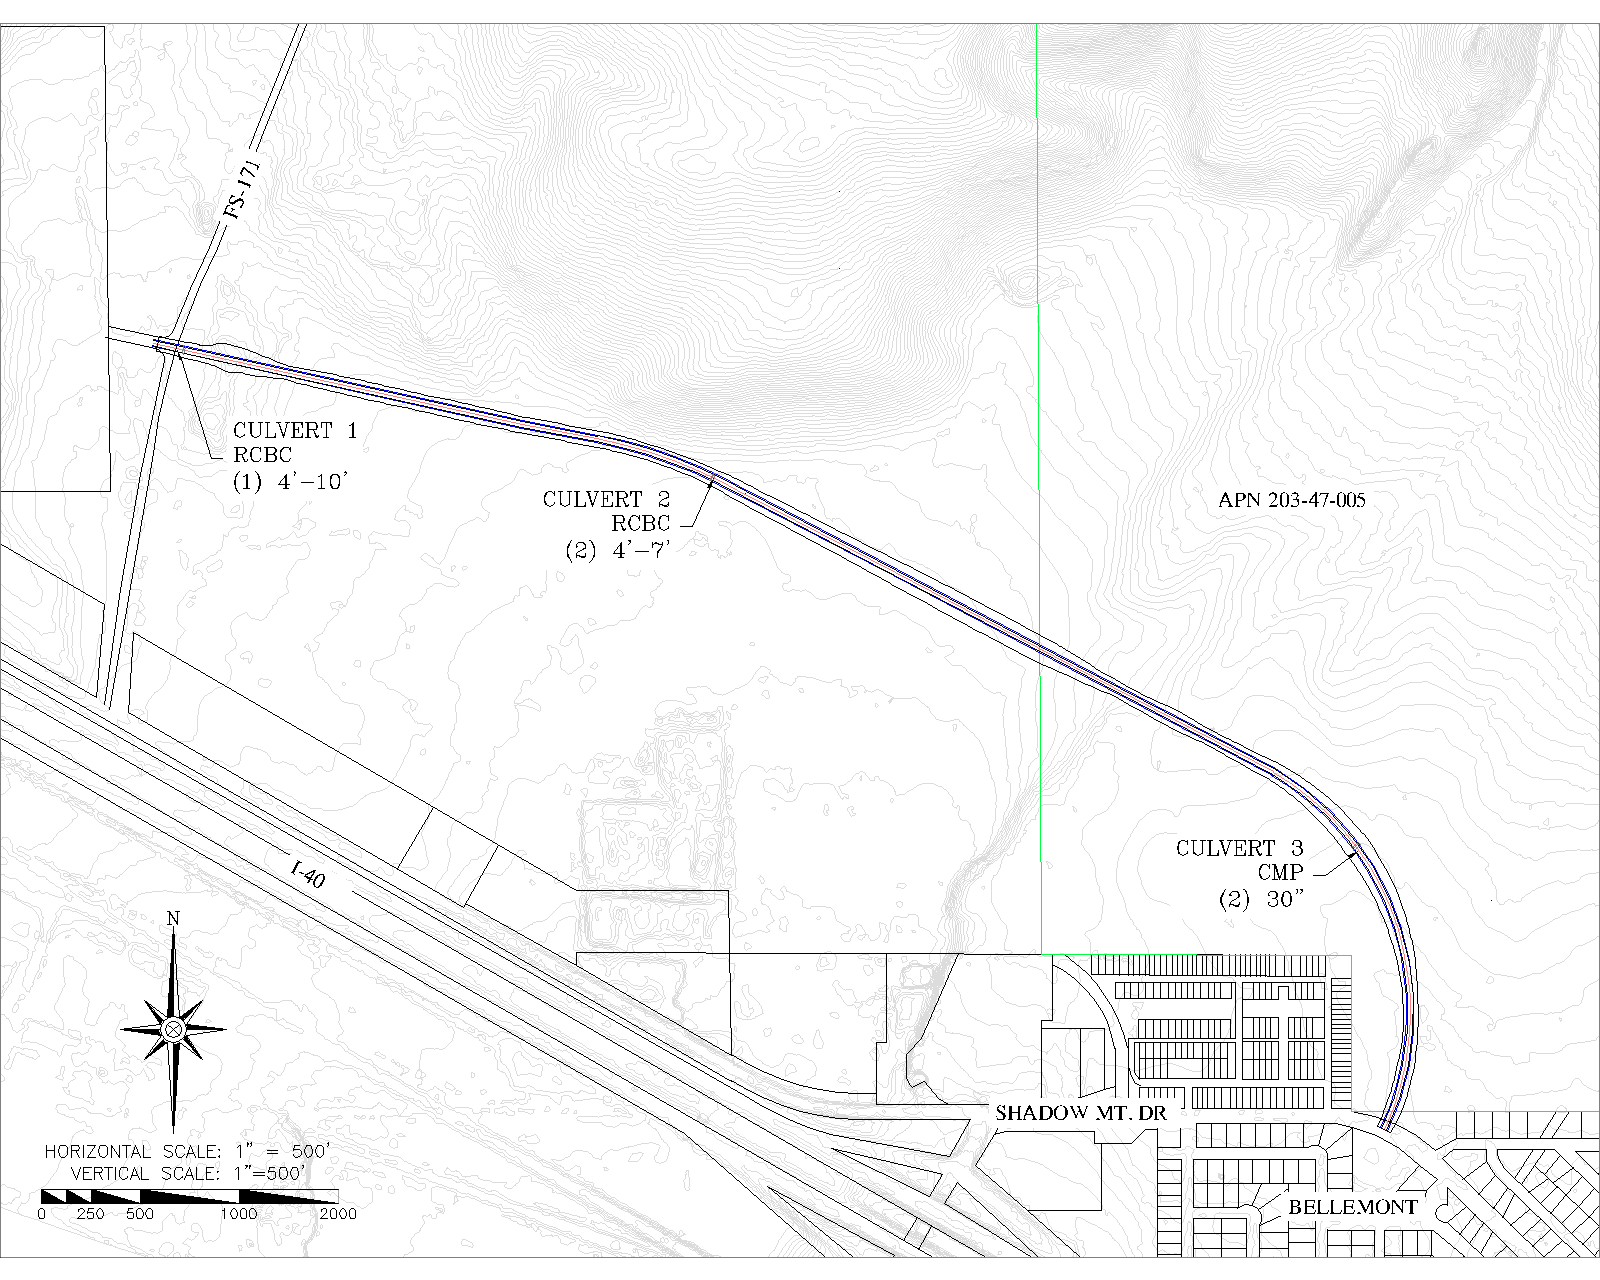
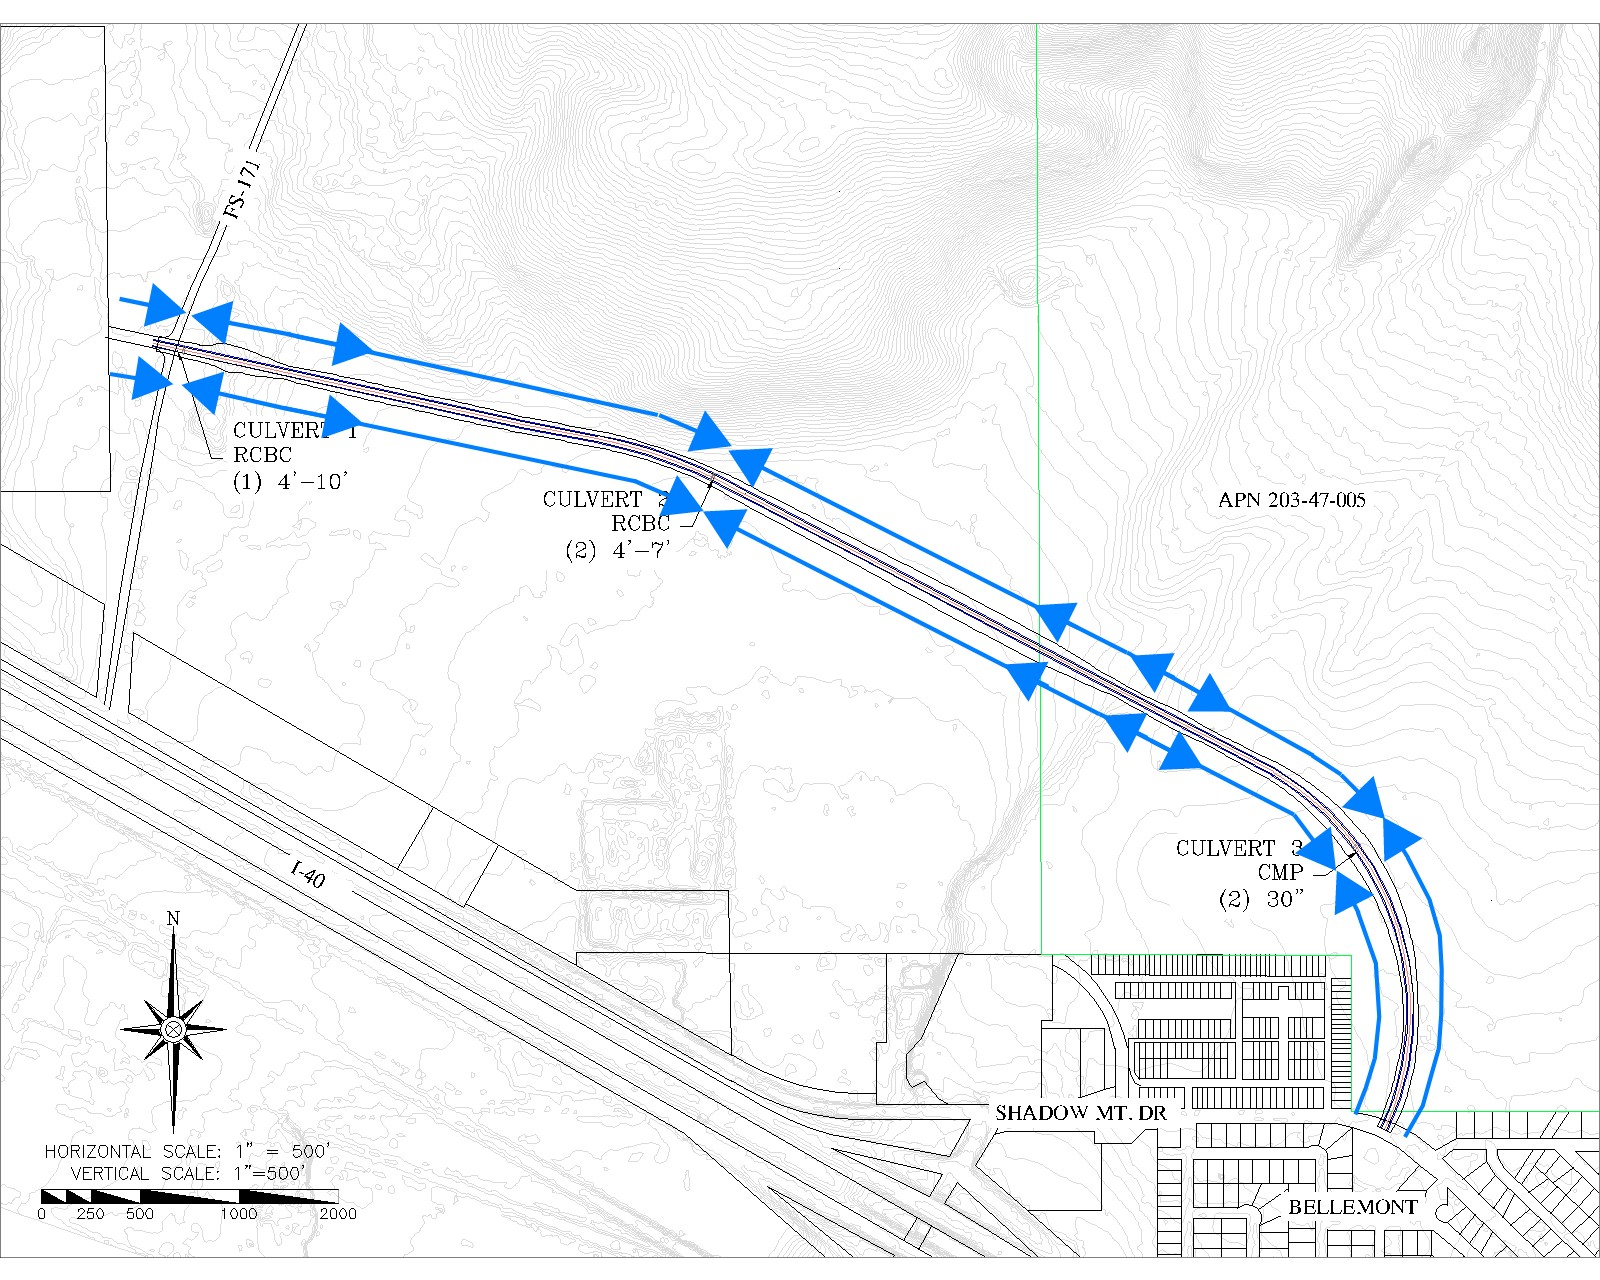
The table below shows the details of the proposed culvert design.
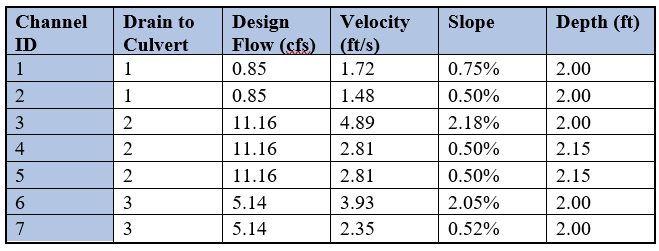
The table below shows the details of the proposed roadway ditches.
The image below shows the details of the site plan with cut-fill information.